
Gearing Up: Must-Have Tools for the Aspiring Rockhound
Equip the Collector
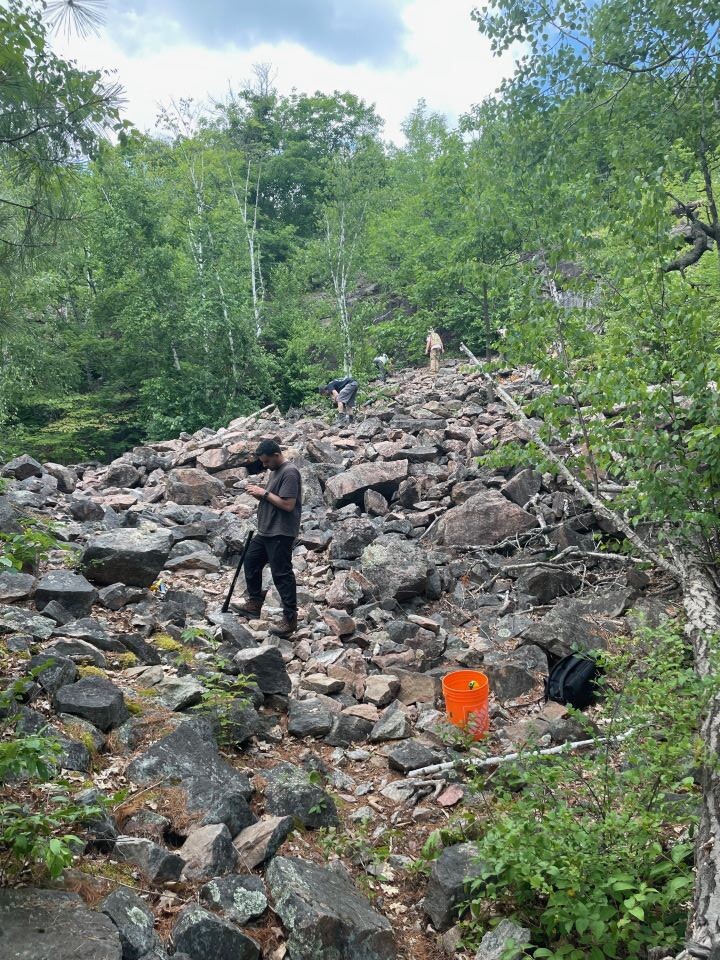
Check our Gallery for photos of field trip participants and their tools.
Give us your feedback below.

For those new to the world of rockhounding, the prospect of venturing into the great outdoors to unearth mineral treasures is both exciting and daunting. Equipping yourself with the right tools is key to a successful and enjoyable experience. Let’s dive into the must-have gear for any aspiring rockhound.
Tool Tip: Remember that each site may require specific tools, such as those for digging or breaking rocks. These two are essential.
Safety Gear
Safety should always be a priority. Equip yourself with a pair of sturdy gloves to protect your hands, safety goggles to shield your eyes from flying rock fragments, and a hard hat if you’re exploring areas with overhangs or potential falling debris. Depending on the terrain, you will very often need a pair of sturdy work or hiking boots to reduce the chances of twisted ankles and bruised toes. If visiting an operating mine or quarry you will almost certainly be asked to wear CSA approved safety-toe boots.
Field Bag or Backpack, Bucket
A robust field bag or backpack is crucial for transporting your tools, specimens, and other essentials. Choose one with multiple compartments to keep your gear organized, and padded straps for comfort during extended journeys. Proper wrapping is vital for fragile specimens. If you’re gathering numerous samples, a sturdy bucket with a lid is beneficial.
Match the tools listed below with the location and type of mineral extraction they are suited for:


Rock Hammer
A sturdy rock hammer is essential for breaking rocks and revealing the minerals within. Look for one with a flat head on one end and a chisel or pointed pick on the other. This tool is your go-to for extracting specimens from their rocky matrix.
Chisel, Sledge and Pry Bars
To complement your rock hammer, one or more chisels (with hand protection), a sledge hammer (short handle can fit in the bag) and pry bar will help you extract larger specimens with precision. Use chisels to create controlled breaks and pry bars to gently lift rocks. Remember, safety first – always wear safety goggles when using these tools.
Garden Trowel and Hand Rake
A garden trowel and hand rake are perfect for more delicate work, allowing you to sift through soil and gravel with precision. These tools help you carefully extract specimens without damaging them.
Shovel
A sturdy shovel is crucial for digging into the soil or gravel to uncover buried minerals and crystals. Opt for a lightweight, collapsible shovel that’s easy to carry but sturdy enough to handle tough digging.
Knee Pads or Garden Kneeler
Knee pads or a foam garden kneeler provide cushioning and support when kneeling on hard or uneven surfaces. They’re especially useful for older rockhounds or anyone with joint sensitivity.
Classifier or Sifting Screen
A classifier or sifting screen is perfect for separating larger rocks and debris from finer material. Simply place soil or gravel in the classifier, shake it, and let the smaller particles fall through while larger crystals and rocks remain. This tool makes it easier to find hidden treasures in the material you collect.
Water and Snacks
Rockhounding can be physically demanding. Stay energized and hydrated by packing plenty of water and some high-energy snacks. This will keep you fueled for a full day of exploration.
Bug Repellant and Net
In the warmer months, mosquitoes and other insects can be a nuisance. Pack a reliable bug repellent to keep the bugs at bay or bring a mosquito net or head covering.
Other Things to Consider
- Hand Lens or Loupe (10x with LED)
- UV Light 365nm Long Wave
- Soft Brush to clean off finds
- First Aid Kit
- Notebook and Pencil
- Rock and Mineral Field Guide
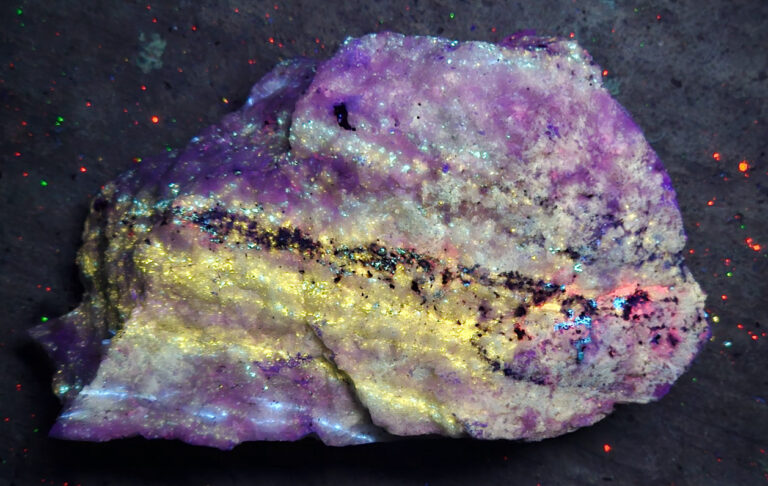
Many minerals are fluorescent under Ultraviolet light. A portable LED UV light can be very helpful identifying minerals as well as locating attractive collectible fluorescent minerals. Modern LED flashlight-type UV lights are powerful and not very expensive. Long-wave UV lights are typically most effective for common minerals like calcite, although specimens from some localities can respond more to short-wave and mid-wave light.
Conclusion
Embarking on a rockhounding adventure is a thrilling experience, made even better with the right tools at your side. By gearing up with these essentials, you’re not just collecting minerals – you’re creating unforgettable memories and connecting with the rich geological history beneath our feet. So, pack your gear, respect nature, respect the property, and get ready to uncover the hidden treasures that await you. Happy rockhounding!


Great article
Do members get a discount at a local store? Is a rock hammer called that, or is it a brick hammer in the local stores? Classifier or Sifting Screen, do I build it or buy it? What grain of screen is in a Classifier or Sifting Screen? What is a good size for a Classifier or Sifting Screen? What type of pen is used to number the rocks collected? Don’t you need to bring toilet paper, the very basic tool? ha ha
Hi Morgan, nice to hear from you. Toilet paper is indeed one of the most important tools on a rockhounding trip! Not only for the purpose that it was intended but it’s great for the first layer of wrapping for the small, delicate specimens you might find.
As for rock “hammers”, they are more properly called “rock picks” and the classic ones are made by Estwing. I believe they come in 2 main weights: 13 oz and 22 oz. They are available on Amazon and sometimes on Ebay (the ones currently on sale there have high shipping charges). I don’t know of any stores in the Ottawa area that sell these picks or other rockhounding supplies so if anyone does, please let us know. Sometimes there is a dealer selling rockhounding tools at the local mineral shows, we’ll try to find their name and post a link in future.
In terms of sifting screens, one of our members got his at Lee Valley and had these comments: “It works great although I had to tie the wider Filter screen in place so it would not drop out of the frame (it comes with a 1/4″ and 1/2″ screen). As for pen, I use two: White Acrylic Paint pen with a wide and thin marker tips to draw a white circle on the underside of the displayed mineral. When it dries, I then use a thin tipped black permanent marker to add the ID number that matches the spreadsheet documentation I made. It works quite well and does not fall off like tape but is still removable if needed”.
Hope this answers your questions.
Cheers
John B